InsightIDR
Next-gen SIEM for the cloud-first era
- Scale and speed for hybrid environments
Embrace digital transformation, SaaS adoption, and agile development with elastic, cloud-native security information and event management (SIEM). - Pinpoint critical, actionable insights
Command your attack surface with AI-driven behavioral detections, expertly vetted threat content, and advanced analytics. - Act on threats anywhere with confidence
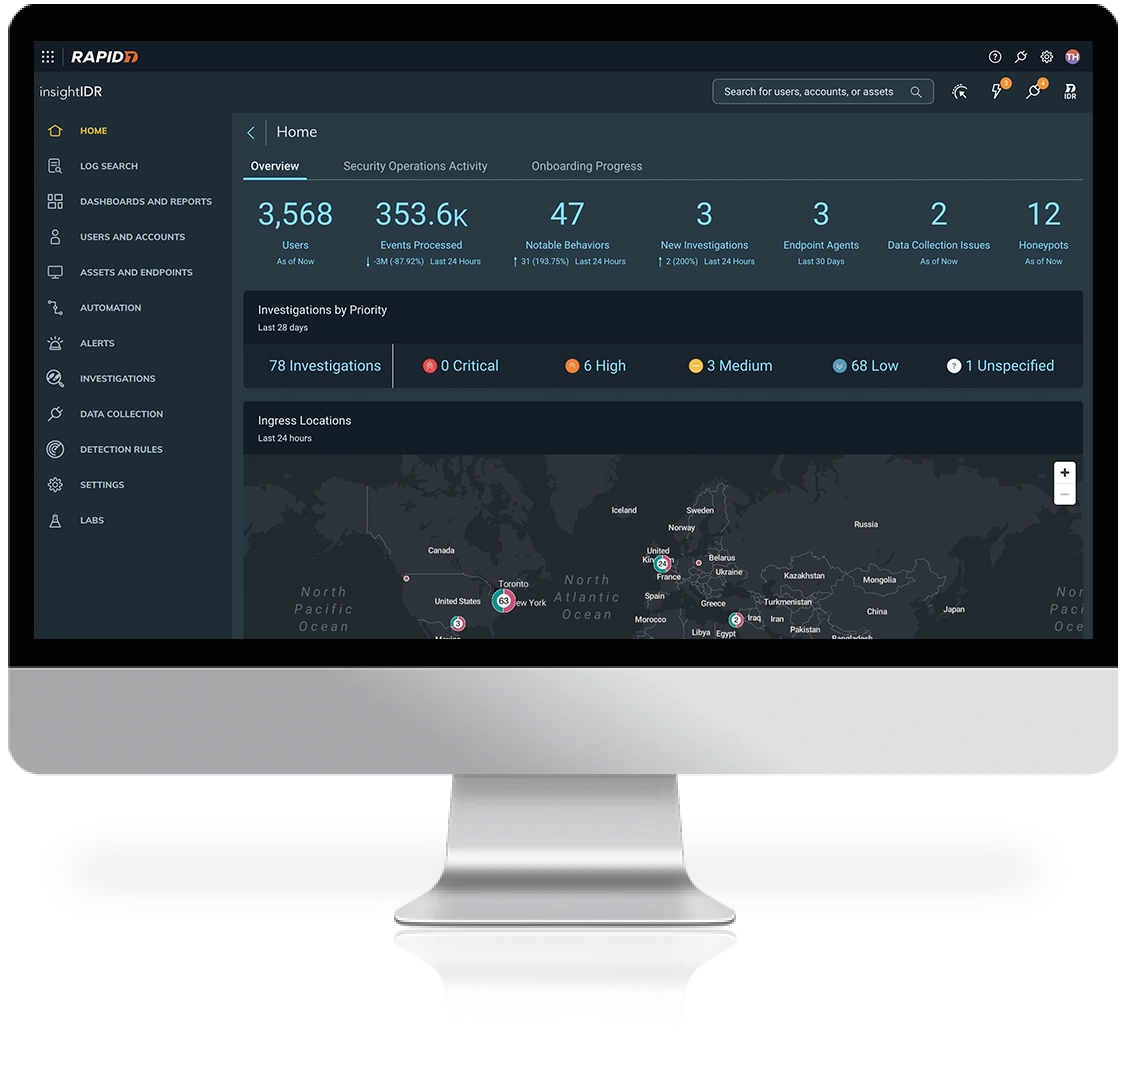
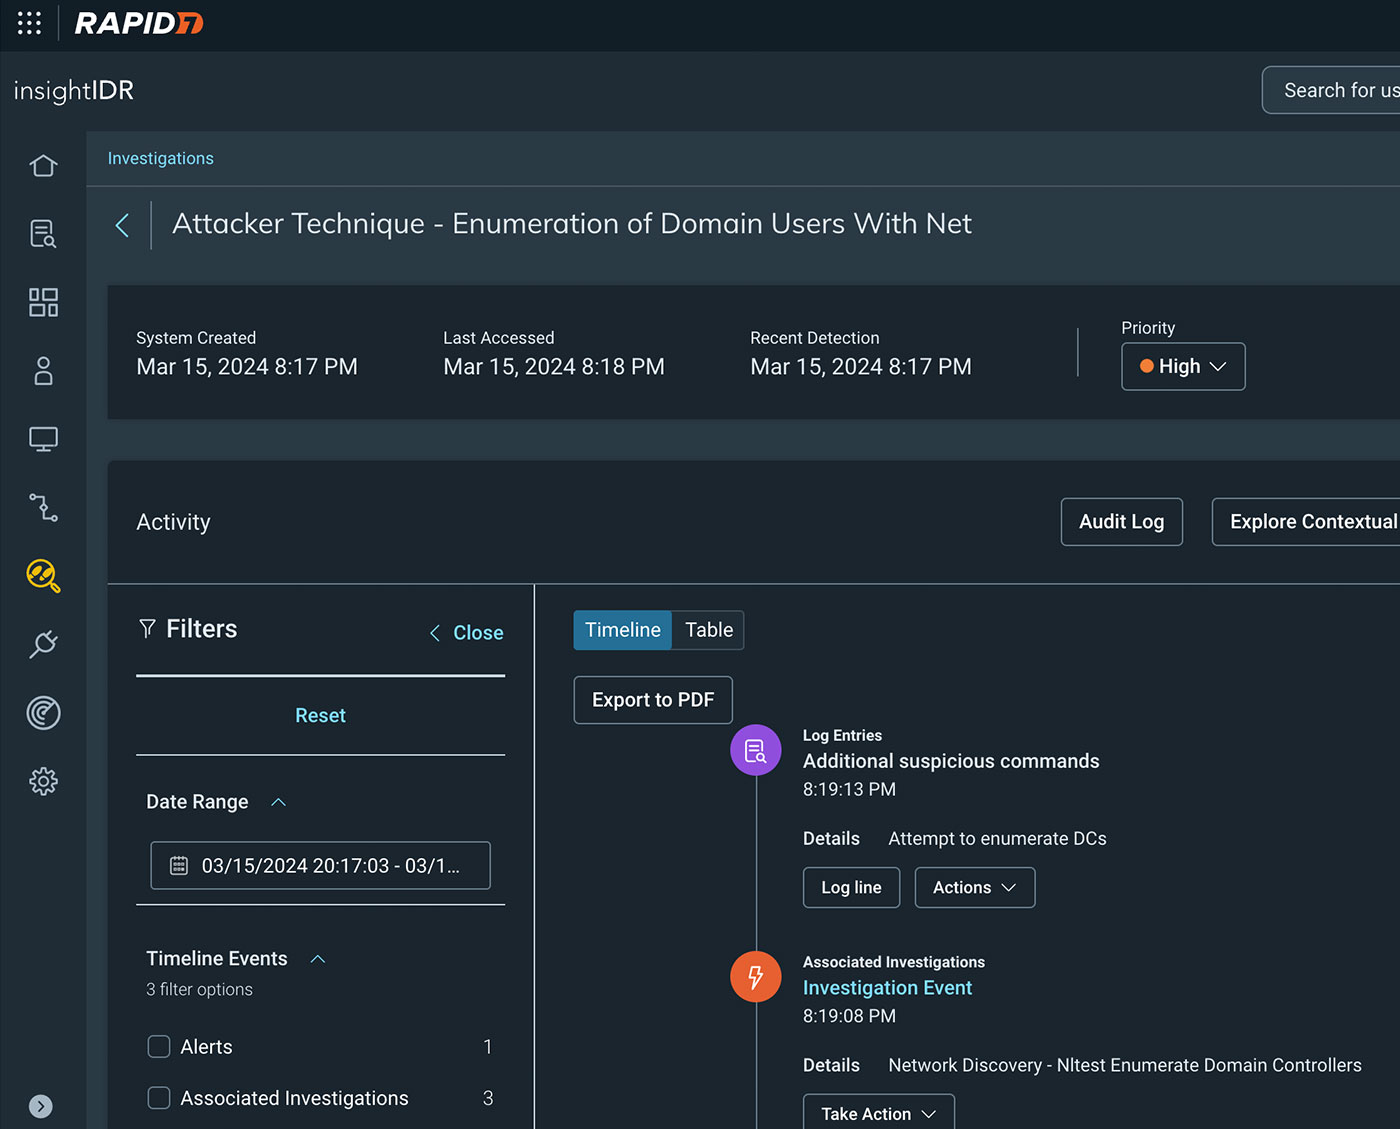
High context investigative timelines detail attack techniques, impact, and recommended response in a single view.
Built and vetted by experts
InsightIDR delivers an always-up-to-date library of ATT&CK-mapped detections that span AI-driven alerts, attacker analytics, and IOCs to provide complete and emergent threat coverage. Vetted in the field by our MDR experts, you get high fidelity coverage to keep your organization safe, anywhere.
Remove complexity from cloud threat response
Modern threat response requires a modern approach. Confidently triage cloud alerts with a purpose-built alert framework that surfaces critical alert summaries, impacted resources, and recommended response to prioritize and act on threats across cloud workloads and your evolving environment.
Consolidate with confidence
It's a new take on SIEM: cloud-ready scale and extensibility, expert-vetted detections, and DFIR built for hybrid environments. Drive your security program forward with a SIEM that's ready for the rest of your business.

Key Features
- Security Information and Event Management (SIEM)
- Endpoint Detection and Response (EDR)
- Network Traffic Analysis
- User and Entity Behavior Analytics (UEBA)
- Cloud and Integrations
- Embedded Threat Intelligence
- MITRE ATT&CK Alignment
- Deception Technology
- Incident Response and Investigations
- Response and Automation
Scale at the speed of the cloud-first era
Your business is ready for change – are you? Supercharge your team with a SIEM solution built for evolving environments:
- Deploy and see value in days, not months
- Transform disparate data into a single actionable view of your environment
- Eliminate noise with high-fidelity detections you can trust
- Respond to threats in 1/3 of the time with expert recommendations and full SOAR
Helping 11,000+ global companies take the gloves off - View Customer Stories
Our Services
Managed Detection and Response
Accelerate your security maturity and ability to detect and respond to threats with our experts’ hands-on, 24/7/365 monitoring.
Learn MoreDeployment Services
Our deployment services for InsightIDR help you get up and running to ensure you see fast time-to-value from your investment over the first 12 months.
Learn MoreTraining & Certification
Get the most out of your incident detection and response tools with specialized training and certification for InsightIDR.
Learn More